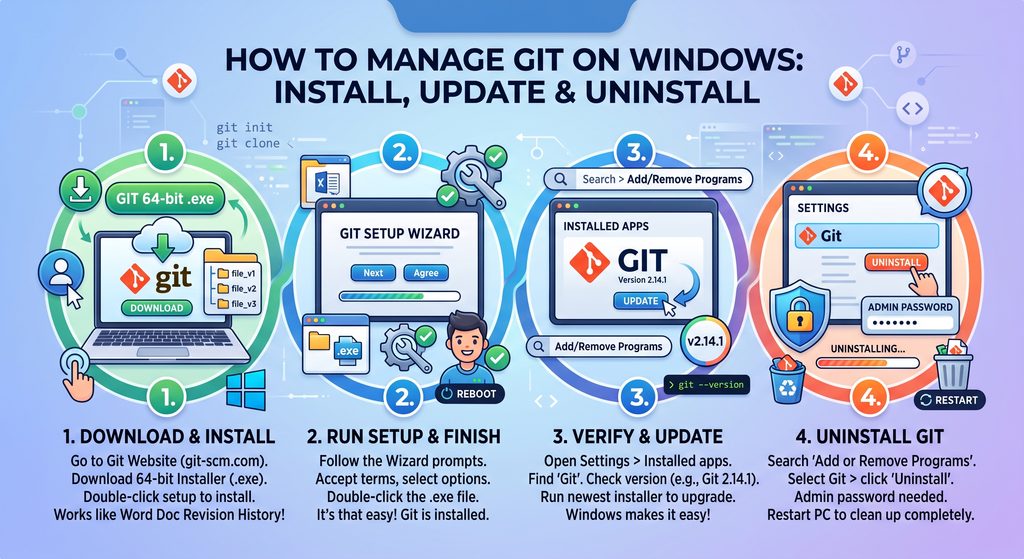
Whether you are collaborating on software or managing personal coding projects, having a reliable way to track your work is essential. That is where Git comes in.
Git is a version control system that tracks changes across your files and folders. Think of it like the revision history in modern document editors: if a change breaks your code or you want to revisit an earlier draft, you can revert back to a previous version with ease.
Follow this straightforward guide to download, install, update, and manage Git on Windows.
Step 1: Download the Installer
- Head to the official Git website.
- Navigate to the Windows download section and select the 64-bit standalone installer.
- Choosing the 64-bit version ensures optimal performance and compatibility with modern 64-bit processors.
Step 2: Run the Installation Setup
- Locate the downloaded installer file (ending with the
.exefile extension, which marks it as an executable program on Windows). - Double-click the
.exefile to launch the setup wizard. - Follow the on-screen prompts to complete the installation.
- Reboot if prompted: If the installer requests a system restart, go ahead and do it. Restarting allows Windows to properly update environment variables and background services needed for Git to run smoothly.
Step 3: Verify the Installation
To confirm Git installed successfully, check your installed applications list:
- Open the Windows Start Menu and search for Installed apps (or Add or remove programs).
- Scroll through the list or use the search bar to find Git.
- You should see the entry along with its version number.
Alternatively, you can open Command Prompt or PowerShell and run:
Bash
git --version
How to Update Git
Keeping Git up to date ensures you have the latest performance improvements and security patches:
- Simply download the latest 64-bit installer from the official website and run it.
- The installer automatically detects your existing configuration and updates your installation to the newest version.
How to Uninstall Git
If you ever need to remove Git from your system:
- Open Settings > Apps > Installed apps (or Add or remove programs).
- Locate Git, click the menu icon (or select the app), and choose Uninstall.
- If prompted by User Account Control (UAC), enter your administrator credentials to authorize the removal.
- Follow the uninstaller prompts, then restart your PC to clear any remaining temporary files or cached paths.